
Recreating the Dion Lee 3D Filter Jacket

The long awaited DIY tutorial for Dion Lee's Filter Jacket is finally complete! It's been quite a journey for this particular DIY, I remember going out and getting a faux-leather jacket from Forever 21, but fell in love it and couldn't bare to cut it up. Good thing I didn't because I found an even better base jacket from Dynamite this holiday season and the filter design works impeccably with it!
I first fell in love with Dion Lee's Filter Jacket when I came across this picture by Tommy Ton. The intricate back on Christine Centenera caught the eyes of many and had me scrambling to find a way to recreate the spine-like detail.
Gorgeous on its own, but also a beauty with brightly coloured pieces underneath, it'll become a well-loved piece in your closet! I wore it all throughout my Las Vegas trip over the holidays and got tonnes of compliments on it. Trust me, this is a DIY you WILL want to have in your closet, it won’t be one of those that you make and toss to the back of your closet. Onward with the tutorial!
WARNING: This DIY is an intermediate-difficult level, based on your personal sewing abilities.

What you'll need
Jacket
Leather: large enough to cover the back of the jacket (alternatively you could use pleather if you can find something that is black on both sides, I suggest leather because it has a better structure for this jacket)
1/2" leather trim (approx. 2-3 yards)
Chalk
Sewing Machine
Black Thread
Needle
Pins
Scissors

Steps
1. Trace the back of your jacket onto paper, then cut out the back of the jacket, be sure to remove the lining.
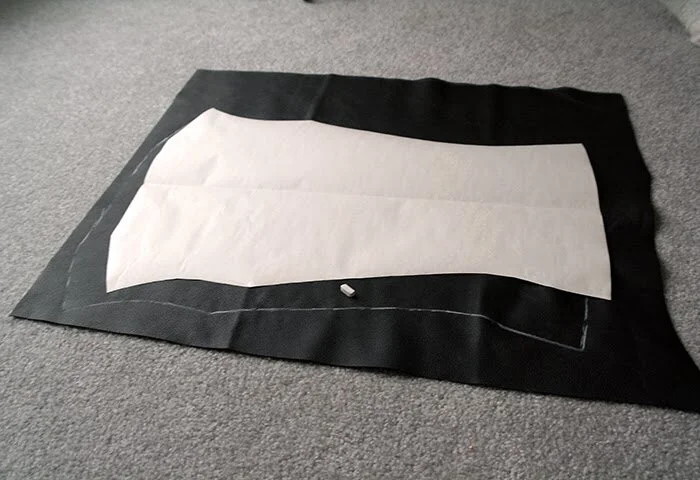
2. Take your traced back piece and transfer it to your leather, this will be your new back for your jacket
3. Sew the new leather back to your jacket
It should look something like this!

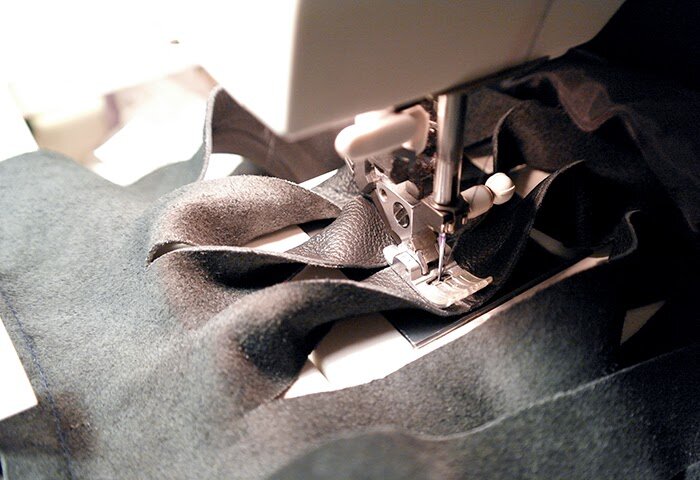
4. Draw a center-line then draw lines 1" apart on the back of the jacket, be sure not to get too close to the edge, I did a diamond like pattern. Cut on the horizontal lines

5. Twist each band and sew following the drawn center-line
After sewing the bands, it should look something like this!

6. Weave! Take your leather trim piece and go back and forth in a figure eight like shape. The images explain this part better than words. Sew down the starting end of the leather trim on the inside of the jacket so that it's not visible.
Continue weaving...

7. Add a bottom slit to thread the leather trim through and sew it down on the inside.

Completed!
Original jacket: $2500+ vs DIY Cost: $100
